Hello hello hello, happiest of Sunday’s unto you noble reader! It’s a long weekend up here in foggy Canada town, and boy are our borders locked down. But, there’s always lots to do when you’re a DIY boy!…
Oh boy... The DIY backlog isn't looking so hot these days...Especially when my DIY box looks more like a laundry hamper...
OK so maybe I’m running low on projects other than 15 16n Faderbanks I still have to pump out… So no build diaries today sadly. Hopefully the world will open back up soon, and I can get to making some new things… but for now we’re gonna talk KiCad for Eurorack.
Don't look too close... I'm still learning.
So what’s a KiCad, and why do EAGLE’s fly? (That was a little CAD joke for the CAD-heads out there) Let’s ask our friends at Wikipedia:
KiCad (pronounced “Key-CAD”) is a free software suite for electronic design automation (EDA). It facilitates the design of schematics for electronic circuits and their conversion to PCB designs. KiCad was originally developed by Jean-Pierre Charras. It features an integrated environment for schematic capture and PCB layout design. Tools exist within the package to create a bill of materials, artwork, Gerber files, and 3D views of the PCB and its components.
First of all, KEY CAD? I’ve been calling it Kit-Kat like an asshole for years. Oh man.
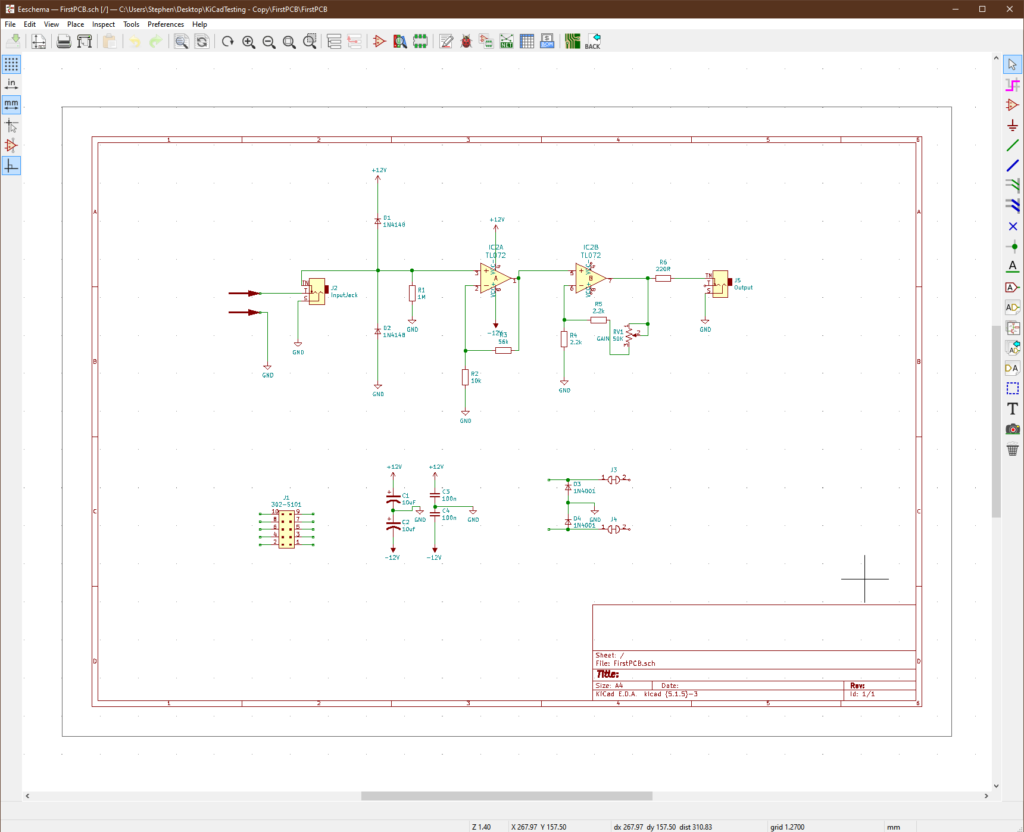
Second, what we are really talking about is a piece of software that lets you move your electronics ideas from breadboard/paper to a full-blown chunk of PCB. I’m sorry I talk/type like an idiot. Here, pictures help.
Again, don't look too close. I'M LEARNING. This is a passive attenuator/filter schematic I've testing KiCad with.
What we have here is a schematic/drawing of the circuit I am hoping to have manufactured into reality. I wanted to start simple without any sort of power source, just to be extra safe. Although I am an “engineer” by trade, in reality, I’m a glorified IT guy; plugging things into the wall that I designed is not something I plan on doing, being a brand new PCB-Boy and all.
ANYWAYS. Once the design has been laid out in the “Eeschema”, we are able to send our schematic over to the PCBNEW portion of KiCad, where we layout the components as we would like them to appear on the PCB (printed circuit board, COME ON READER you know this!).
Schematic on the left, footprints of those components imported on the right (I forgot the polarized caps, SUE ME).
The above example is the application circuit for the Druid Pentanoise chip. Once it has been imported to PCBNEW we get the beautiful mess of components you can see in the above image. Sadly, this is the best placement you’re going to get from KEY CAD. But that’s OK, we want to place them ourselves.
I won’t be going through how to do any of these things step by step. But as an example, look at this pretty little layout you saw earlier, but with the added bonus of a 3D PCB render!! Neat!
Looking like it's ready for a virtual trip to China!
And without getting into the nuts and bolts, that’s KiCad with a little Eurorack flair!
All you CAD-heads are probably wondering, why not EAGLE? For one, the cost is killer when you want to make anything with more than two layers or bigger than 160cm^2. How killer? Pictures are worth 645 words:
TOOOOO much for a little Eurorack enthusiasm if you ask me.
Also, the geek in me just loves open source software. While there are certain things that make KiCad a pain, like the footprint and schematic libraries, once you’re in the mix and making PCBs, this all just becomes routine. And the “fine-grained” nature of the program forces you to think a little harder about your design. This extra work up front has actually saved me time more than once.
My biggest wish/want for KiCad, is a simple method for importing EAGLE drawings. Don’t tell me it already is easy, because it ain’t. Sure there are tons of conversion scripts, but my god you need a degree in Software Engineering to use them.
So until then, I’ll copy some simple schematics by hand until I get the hang of it!
Mikrophonie is a nice simple one to start with. Some big plans for this stolen schematic... Thanks Tom!
And that’s it folks! I am going to be flexing my KiCad muscles as much as I can during the pan-demmy, see if I can’t not get something printed off before the summer kicks in.
I will include some links below for getting started with KiCad for Eurorack. Keep in mind, most of these articles are not specific to Eurorack, or even music, but they will help you on your KiCad journey!
Stay sassy, and have a beauty week indoors!
Quick Links
Beginner’s Guide to KiCad – Great place to start, follow along as best you can as they are using an older version of KiCad in this tutorial. Still lots of great information.
Quick Start KiCad Video – This video will help keep you fresh when you forget little things. Quick and painless, great video!
ExtraLife Designing a Eurorack Sequencer – WHATEVER EXTRALIFE, we get it, you’re smart and gorgeous, don’t tell my wife. Either way, this is a great video with lots of information on getting stuff done in KiCad, and designing a PCB in general.