It’s finally happening! First it was a twinkle in Vlad’s eyes, now it’s a DIY project in my filthy little hands. Thank you Vlad.
Ready for action!
Getting Ready
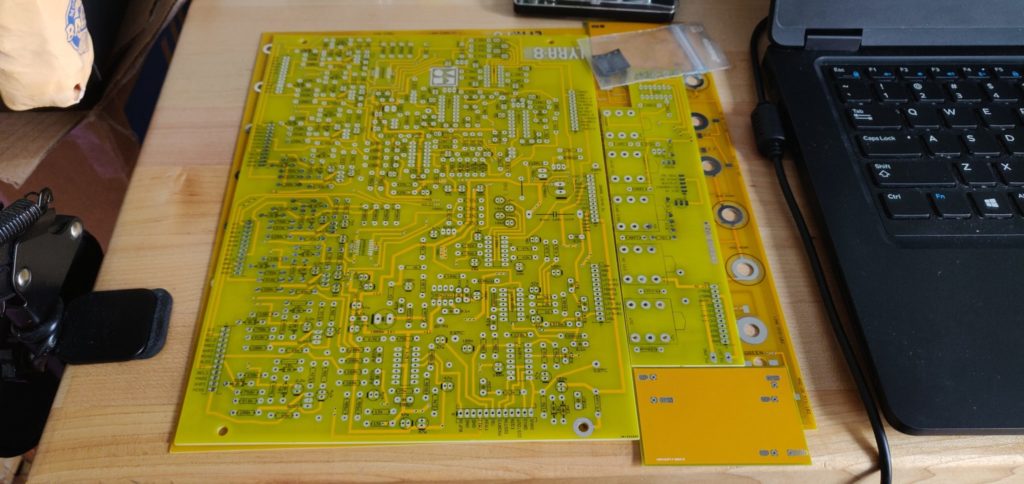
So how tough is this project? Well, if the yellow solder mask doesn’t scream “caution”, the amount of components we’re dealing with sure should!… Sorry for the bad joke. Are caution signs yellow in other countries?
Anyway, how tough it is to throw together remains to be seen. As of writing this blog I have **SPOILERS** finished the control board, the resistors and most of the non-polarized caps on the main board. Either way, it hasn’t been a walk in the park, and troubleshooting will be interesting without schematics.
To make things a little easier with a project of this size, I recommend doing some light reading before bed. Here is your DIY LYRA-8 reading list:
Done reading? Good. Now here are a few other things to think about. How are you going to connect the main and control board? Dupont cables? String? Sheer power of will? What are you going to put everything in? Do you have a panel? Have you thought about the DIY LYRA-8 Expansions? Thanks again flounderguts over at Muffwiggler, you are the man.
My answers are, dupont cables and pin headers. SMD headers on the control board. Not sure what I’m putting it in, but I’m grabbing my panel from flundrton. No go for me on the expansions… maybe once this thing is making sound I can think about that.
As far as a BOM goes, I used the Mouser Cart link from SOMA. For the most part, it has been pretty good so far. One of the resistor values was wrong (75 ohm instead of 75k ohm, honest mistake), but other than that they amounts and values have been spot on. I’m not done with caps yet, so I will list all the discrepancies when I’m finished. Hopefully that was the only one!
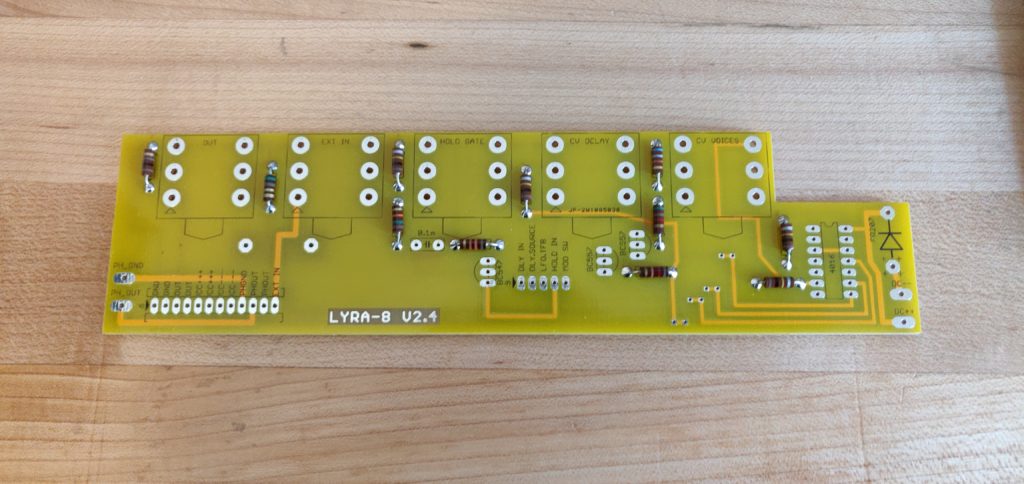
The Control Board
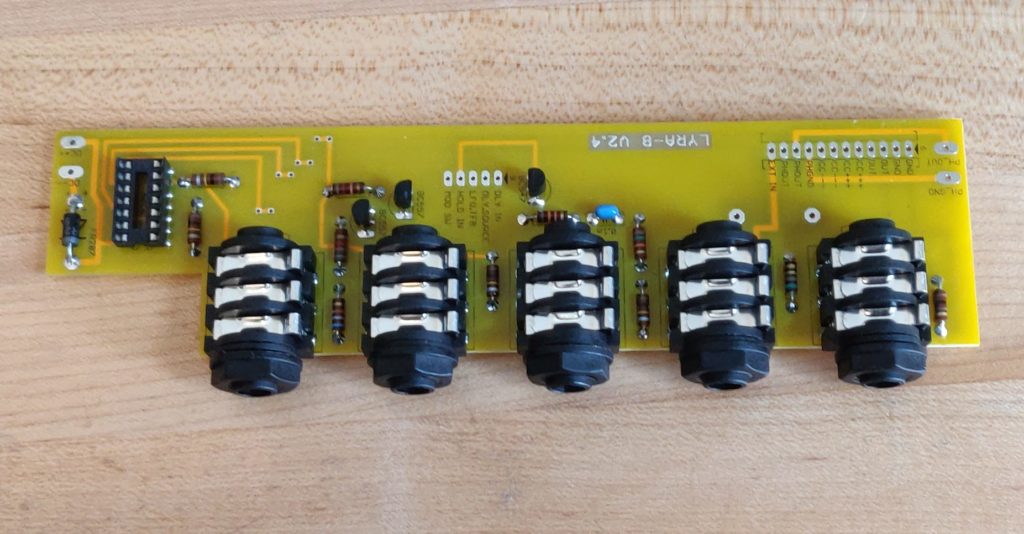
Usually I would do something like the control board as a cute little celebration for completing the main board, but I don’t do a lot of through hole stuff, so I decided to start slow. I also wanted to try my new “solder from the top” method I picked up on the interwebs, and the control board seemed like a good guinea pig for this task!
Here we go! Multimeter ready for troubleshooting before it even begins.
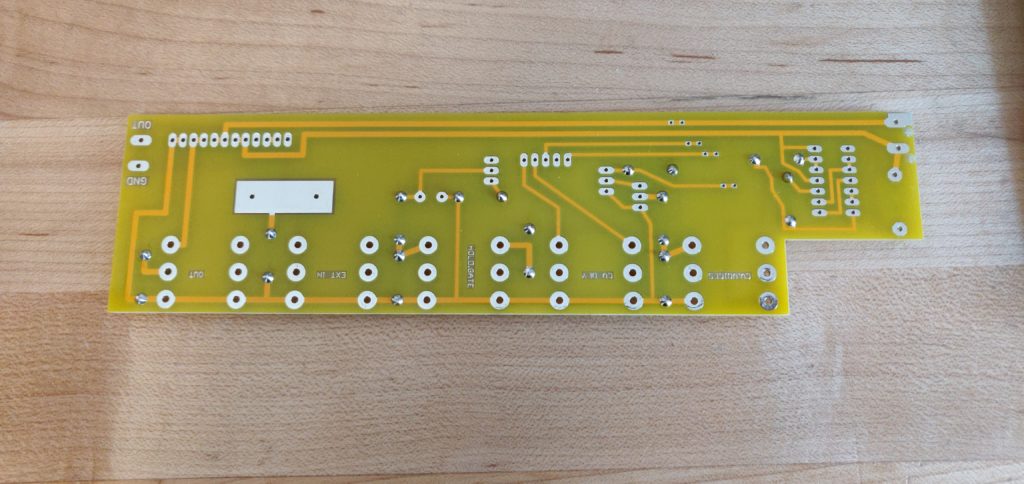
And to be honest, it turned out really well. Now I don’t have to fumble and worry about loosing parts when I flip the PCB upside down. Plus, look how smooth those solder joints look! Damn, that’s some shiny lead. (Sorry RoHS, I’m not even sure what you stand for).
Soldered from the top. Flip it around and....
So smooth, so soldered.
And before you know it, the control board is done! And looking mighty fine if I do say so myself.
No chips in sockets on the first night, I'm a gentlmen after all.
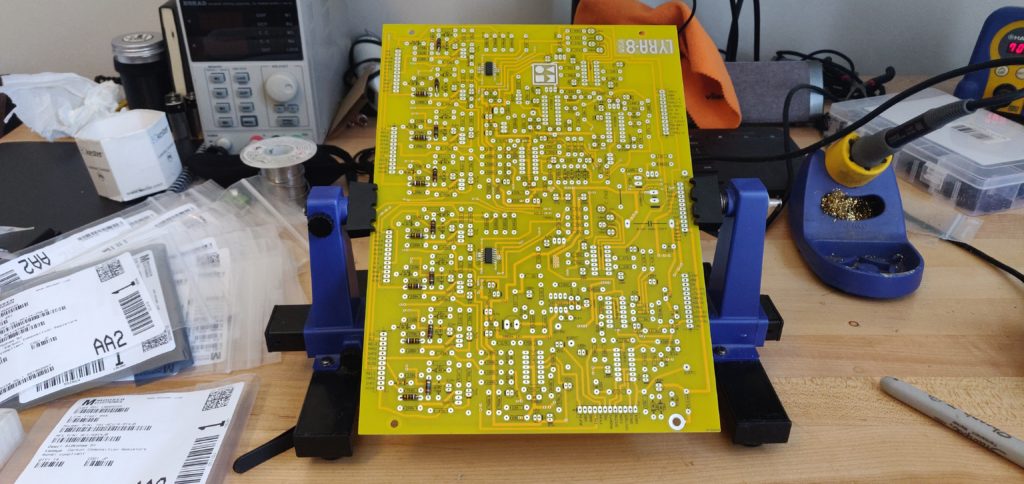
The Main Board
There’s a lot to solder, so my advice is really just to take your time. First I did the SMD chips, provided by the man Vlad himself. Remember, the angled side on the chip is where pin 1 is. There is no dot or indent on this chip, just that angled edge.
And before you know it, we’ve got them both in there, and a fistful of resistors to boot!
Not too shabby! Only a couple hundred more things to solder.
And from here on out its just a matter of soldering on. Pun intended.
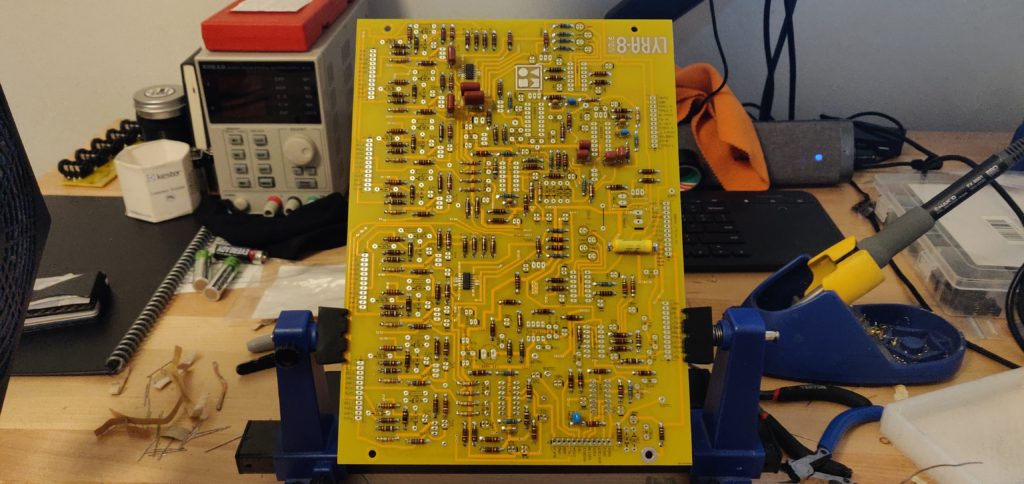
An hour or five later we have ourselves something that’s starting to look like something!
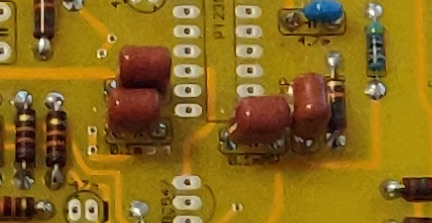
Uh oh... there's a problem. And the problem isn't how DOPE that CCP cap looks. So yellow.
Don’t be a goof like I was. Stop when you’re getting sleepy, take breaks. Then you won’t do things like solder film capacitors where there should be ceramic ones.
01.mmP are correct, but the 0.1m...That should be ceramic.
I blame the weird “m” values on the silkscreen, and also maybe soldering a little longer than I should have.
For all you future DIY LYRA-8ers, remember: “m” is equal to uF. And if it says mmP, it should be a film capacitor, whereas the regular “m” should be ceramic. Gotta get these things right in a proper noise machine.
Next time on THE BLOG FILES
Well, we’re gonna finish building the LYRA-8, isn’t we ain’t we? Stick around, next Sunday there will be some more sweet sweet DIY LYRA-8 action.
Want something a little more bread-boardy? Check out the first part of the Druid Diaries, or maybe infamous SMR Build perhaps?
Keep it saucey out there folks, and have a beauty one!
I’m on the waiting list for a set of boards myself, so I’m glad I found your blog! The finished result is fantastic. Where did you get the pressure pads? I don’t seem them in the Mouser cart.
Glad you found it too Andreas, always happy to have a new reader! It’s a fun build for sure. The pressure pads, sadly, aren’t in the Mouser Cart. You have to source those separately (same with the potentiometers and other hardware). I’ve been rather lazy on that front, I’m just using M3 screws I had laying around. A lot of people have had luck with finding them on Ebay or Alibaba. You need to search for DIN653 with a size of M3x12mm long. Hope that helps. Best of luck with your build when the boards come in, keep me posted and let me know if you have any other questions!!
Thanks for the reply! I did not realize at first that the pads were just M3 thumb screws, but something electronic. So that makes things easier. I will certainly check in once the boards arrive, which could take some time, I imagine.
Absolutely! I hope you find it helpful Roger. Thanks for reading 🙂
The pressure pads were tough to source… so I just purchased a new panel from flundrton.com with the pads built into the panel. Sadly I am away from my work bench currently (hence why there hasn’t been a new blog post in months…) but I’ll absolutely be posting updates when I get the new panel on there.
Best of luck with your build!! Please let me know if you have any questions, and we’ll need to see some pictures when it is done.
Two sets? Nicely done, I wish I had grabbed a couple when I had the chance. Dualing Lyra-8’s sounds gnarly.
And you grabbed a DDRM set!! Nicely done, I’m currently working away at the voice boards. I’ve got 4 out of 8 done, so hopefully I’ll be poly-synthing up a storm soon. Also just picked up a Linnstrument, so I’m looking forward to hooking that up to Deckard’s dream!
Keep us posted on the progress of both of them my friend. Excited to see both of your builds!
I missed this reply! Ya, a DDRM Rev 1 kit fell into my lap, PCBs, case, panel, group bought rare ICs locally. ~$600 savings. Who am I to say no. I plowed through it in about 50 hours. Seems to work perfectly after finding one flipped diode on one voice card. It’s lovely! Gonna start the Lyra’s this weekend. Trying to sort out panels, and the dual gang pots… can’t seem to dig those up either.
Flundrton has some choices for panels! You might be well passed this now, seen as this comment was from a month ago 😛 best of luck! I hope your Lyra twins come out perfectly.

I’m on the waiting list for a set of boards myself, so I’m glad I found your blog! The finished result is fantastic. Where did you get the pressure pads? I don’t seem them in the Mouser cart.
Glad you found it too Andreas, always happy to have a new reader! It’s a fun build for sure. The pressure pads, sadly, aren’t in the Mouser Cart. You have to source those separately (same with the potentiometers and other hardware). I’ve been rather lazy on that front, I’m just using M3 screws I had laying around. A lot of people have had luck with finding them on Ebay or Alibaba. You need to search for DIN653 with a size of M3x12mm long. Hope that helps. Best of luck with your build when the boards come in, keep me posted and let me know if you have any other questions!!
Thanks for the reply! I did not realize at first that the pads were just M3 thumb screws, but something electronic. So that makes things easier. I will certainly check in once the boards arrive, which could take some time, I imagine.
Hi Steve
Thanks for your post! Finally I’m waiting for the boards which went out yesterday. I’m already happy to find the information on the pressure pads 😉
Greetings from Switzerland
Roger
Absolutely! I hope you find it helpful Roger. Thanks for reading 🙂
The pressure pads were tough to source… so I just purchased a new panel from flundrton.com with the pads built into the panel. Sadly I am away from my work bench currently (hence why there hasn’t been a new blog post in months…) but I’ll absolutely be posting updates when I get the new panel on there.
Best of luck with your build!! Please let me know if you have any questions, and we’ll need to see some pictures when it is done.
Take care,
Steve
Just got 2 sets of PCBs today. Stoked to build.em, except I got my DDRM parts yesterday… Now I’m torn what to build first.
Two sets? Nicely done, I wish I had grabbed a couple when I had the chance. Dualing Lyra-8’s sounds gnarly.
And you grabbed a DDRM set!! Nicely done, I’m currently working away at the voice boards. I’ve got 4 out of 8 done, so hopefully I’ll be poly-synthing up a storm soon. Also just picked up a Linnstrument, so I’m looking forward to hooking that up to Deckard’s dream!
Keep us posted on the progress of both of them my friend. Excited to see both of your builds!
I missed this reply! Ya, a DDRM Rev 1 kit fell into my lap, PCBs, case, panel, group bought rare ICs locally. ~$600 savings. Who am I to say no. I plowed through it in about 50 hours. Seems to work perfectly after finding one flipped diode on one voice card. It’s lovely! Gonna start the Lyra’s this weekend. Trying to sort out panels, and the dual gang pots… can’t seem to dig those up either.
Flundrton has some choices for panels! You might be well passed this now, seen as this comment was from a month ago 😛 best of luck! I hope your Lyra twins come out perfectly.