Plinky Synth: Build Diary #25

I feel like the global semiconductor shortage was personal. I mean, like, the Plinky synth came out when? Somewhere near the end of 2020?

Well, young reader. Guess who desperately wanted a Plinky synth right near the end of 2020?

This Steve, this Steve right here.

So you tell me, now that you’ve heard all the facts, that it doesn’t sound kind of suspicious that the global semiconductor shortage prevented me from getting a Plinky at the EXACT moment I wanted one? YOU CAN’T CAN YOU?

Video Game Question Mark
I love this picture, and I WON'T stop using it.

Sad Beginnings

Finally, my turn on the wait list came up, and the Plinky synth of my dreams was on its way to me. All SMD pre-soldered and ready for hardware, HOW GRAND.

Plinky Parcel
This should have been a happy picture. But there's pain behind these parcels.

Not to just WHINE AND MOAN, but I paid Canada Post the duty for this little bugger online a week before I received it. My dear postman shows up, slapped the dreaded “We tried to deliver this package” notice on my door, and ran off.

I looked at the notice immediately, as I was sitting by the window like a dog waiting for him to show up, and it said “DUTY OWED, PAY/PICKUP AT POST OFFICE”.

Aghast, I ground my teeth for 24 straight hours while I waited. As soon as the package was ready for pickup, I set off on my bicyclette toward the post office.

Upon arrival, I stashed my air-pod in my left pocket, phone in my right, and got ready to enter the store. I realized, in my urgency to “plink it up”, I forgot a mask (have you heard of this COVID thing?) I rifled through my pockets to make sure I truly forgot a mask, which I had. So I hopped on my bike and returned home.

Somewhere between those two places, my sweet little left air-pod took a dive. I now own a single air-pod because of Canada post.

But I do have a Plinky synth now. So, really, I made off like a bandit.

Packaging of Plinky Synth
An air-pod, customs and shipping fees, plus the cost of the DIY Kit? IT'S STILL WORTH IT.

WAIT. What's a Plinky?

First of all, grow up. Second of all, it’s amazing.

But WHAT IS IT? Well, let’s hear it from the horses mouth:

Plinky is an 8-voice polyphonic touch synthesiser that specialises in fragile, melancholic sounds.

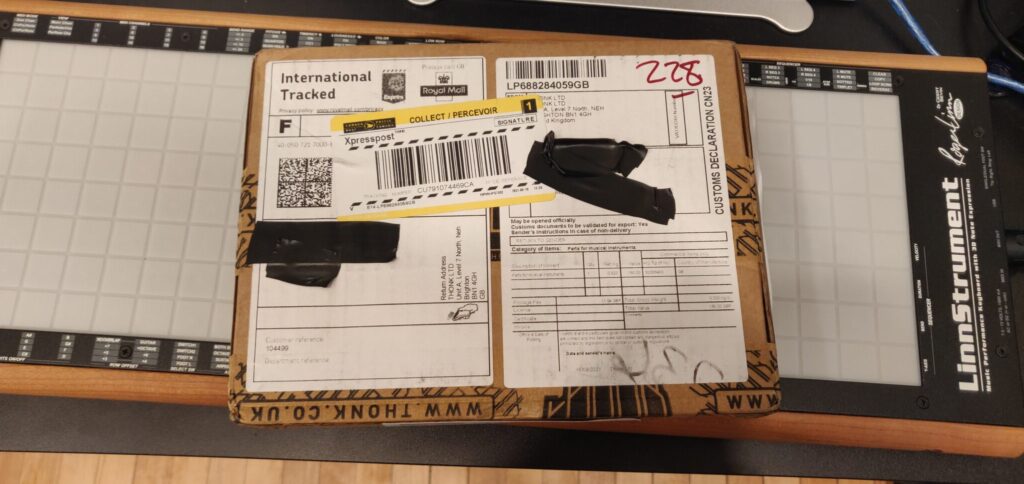
Yessss, yes indeed it is. But give me some more SPECS. We’re nerds around here, Mr. Horse.

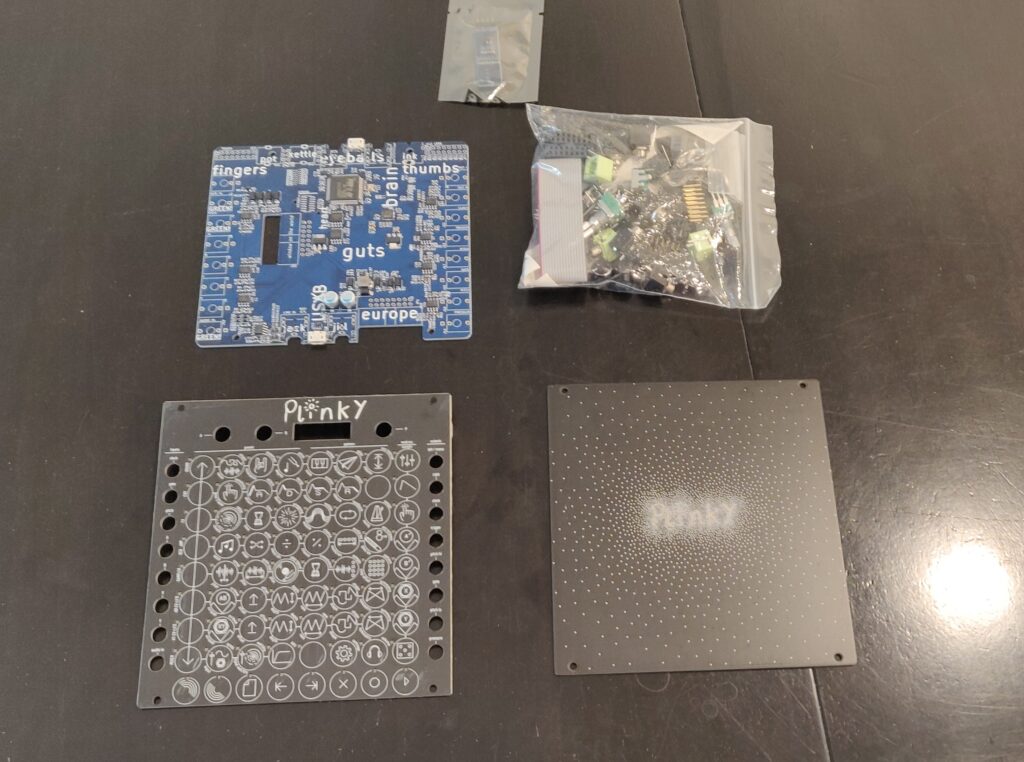
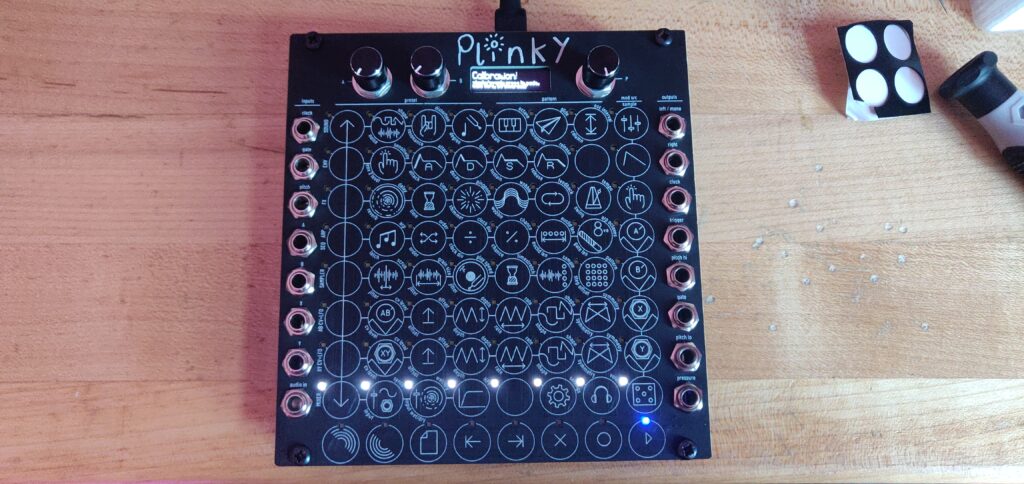
Think of it as an 8 stringed instrument, played by touching the 64 main pads, which are arranged in 8 vertical monophonic strips or strings.

You can play Plinky straight away with those 64 main pads. The row of 8 ‘shift’ keys (blue LEDs) along the bottom are used in conjunction with the main pads to select parameters, presets, sequencer patterns, and samples.

Each of the 8 strings has:

  • Up to 4 oscillators (pulse, supersaw or wavetable) or sampler grains, detuned by the tiny movements of your finger.
  • A white noise generator
  • an ADSR envelope controlling…
  • …a resonant 2-pole low-pass gate.
  • a secondary ADSR envelope with repeat.
  • Distortion / saturation

Plinky supports 4 external CV modulation sources, called A B X Y, each with its own LFO. A & B also have dedicated physical offset knobs, located to the left of the screen. When changing parameters you can use the endless encoder to the right of the screen to fine tune the parameter settings. Clicking the encoder also resets the current parameter.

Plinky also has global delay, reverb, high pass filter, limiter and saturation units along with a simple mixer (for audio inputs), arpeggiator, sequencer and sampler.

YAAAASSSS.

A quick side note, the person behind Plinky Synth is also a person behind some other very fantastic stuff. As a person who aspires to be not only a creator, but someone who can inspire other creators/creations through my own creations…well, let’s just say I couldn’t look up much further when it comes to looking up to someone. Thank you for all your things Alex!

So, What Comes in This Plinky Synth Kit?

ENOUGH GUSHING. LET’S TALK PLINKY.

Shot of the contents of the Plinky Kit
Ouuuu fun.

The contents of the DIY kit include an SMD pre-soldered PCB, an OLED screen + headers, a bag full of hardware, and the front/back panels.

Plinky synth works through capacitive touch, which is kinda magic. Essentially the processor reads the difference in capacitance from the front panel when you touch it with your fingers. This makes the front panel a control interface. HOW GNARLY IS THAT?

Shot showing back of faceplat
All the SMD LEDs looking decent. These pick and place machines are almost as good as me.

And that’s pretty much it as far as package contents. So it’s time to dump that bag and get to building!

Contents of kit's hardware in a plastic dish
Let's DO ITTTT.

Build Time!

Before I start with my sillies and my pictures, do not look to this blog as a “build guide”. The build guide Alex made, as well as the Docs/Manuals, are top notch. Better than most synths, to be honest. It gives me teenage engineering vibes, which I dig.

Anyways, click here for the REAL build guide. And then read below for some infotainment.

First things first, gotta get some audio jackals on there. And, not to just continuously gush, the design is great here. The PCB gives you two options, closer or further from the PCB. Closer makes sense if you want to use this beast in Euro format, as a desktop synth you may want the jacks to protrude a bit.

Being a Euro-Boy, I opted for the closer to the PCB option.


Soldering down the audio jacks
I'm ALWAYS ready for Euro Rack.

Next up, you gotta give the USB ports a little kiss of solder to reinforce the solder work done on the assembly line. Don’t overdo it here, or your solder blobs will leak into the port and prevent the cable from plugging in.

After soldering some headers, it was time to solder the OLED headers. Don’t do it my way, do it the way the guide tells you to.

But me? You think I’d listen to some GUIDE?

Soldering header for OLED
Jank is my middle name. Jank is also a sick band.

Whatever method you use, just don’t use mine and use the guide’s method. It will go much cleaner and easier for you. But irregardless, you may notice the headers don’t completely poke through the OLED PCB. That’s because I wanted it nice and snug with the front panel.

Here’s another shot of how little pin is protruding through the PCB.

A shot showing how the pins just barely hang onto the PCB
No worries team, but seriously, do it the way Alex tells you.

A couple jacks here, a couple pots there, and we’re ready to rock.

Hardware installed for Plinky
Ready for some primetime soldering.

Oh boy I can’t wait.

Flashing the Plinky Synth

This is barely even a thing. The STM chip is already pre-flashed, so you just plug it into your computer and drag and drop an update file.

DONE. And I usually love banging my head against some obscure flashing procedure for nights at a time… This literally took seconds.

Shot of a completed Plinky
Plinky Synth, upgraded and ready to rock!

Does it Boot?!

Oh you better bet your sweet little bippy it boots.

A shot of the powered up Plinky
YASSSSS. We have life. CAPACITIVE LIFE

It really is a beautiful synth. And it doesn’t only look the part, but it truly sounds beautiful too. One day I’ll do a more in depth review with some sound samples, but for now, you get some quick thoughts.

Plinky Synth Thoughts

Pros:

  • The “desktop” configuration is fantastic, top and bottom USB ports give options for connectivity
  • Line level input allows you to push sounds through the Plinky
  • Sequencer, ARP, and LATCH funtions
  • Reverb sounds pretty sweet for such a little box, same for the delay
  • Quantized inputs allow for anyone to step in and feel like a pro
  • … and too many more to name, with 8 voice polyphony in 24hp, built in filters, delay, reverb, and that’s not to mention the litany of other features…there’s too much to like here
  • Did I mention it sounds amazing?

Neutrals:

  • Eurorack compatibility is much appreciated, but the ability to rack the module almost defeats the purpose of it being so compact and portable
  • More param knobs would have been nice, but with how small the device is, I get it
  • Someone’s gotta add a battery to this pup

Cons:

  • Front panel calibration procedure is a little tedious, and you may need to do it a couple times if it seems “off” when you start playing

The End!

I gotta say, the Plinky Synth definitely lived up to expectations. It truly is an inspiring instrument, and it was almost as much fun to build as it is to play, thanks to an incredible build guide and documentation.

I can wholeheartedly recommend this instrument, if you can get your hands on one. I’ll be selling mine to whoever wants it, price tag is $3000. If you buy it with my Mannequins MANGROVE, I’ll do both for $8000.

Shipping not included, Paypal friends and family only.

Anyways, thanks as always for reading folks. Keep your eyes peeled for a Plinky Synth review one day soon. Until then check out another portable-turned-eurorack here in my Pocket Operator Eurorack Adapter review.

Have a beauty week out there, and keep it samesies!

Quick Links

Build Guide (FOR NEW BLUE PCB)

Thonk Product Page

Plinky Github Page


Leave a Reply