Hopefully the title of this blog doesn’t inadvertently trigger a nuclear holocaust. You know, with it being all 81.5:#16.5LY-Ra81.561.5# and whatnot, like a nuclear code.
Sorry. I need to get out more.
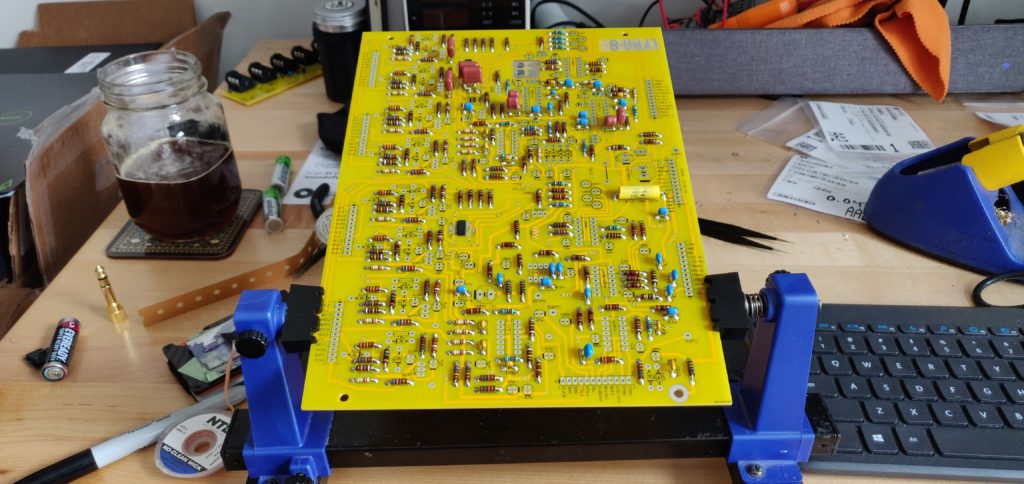
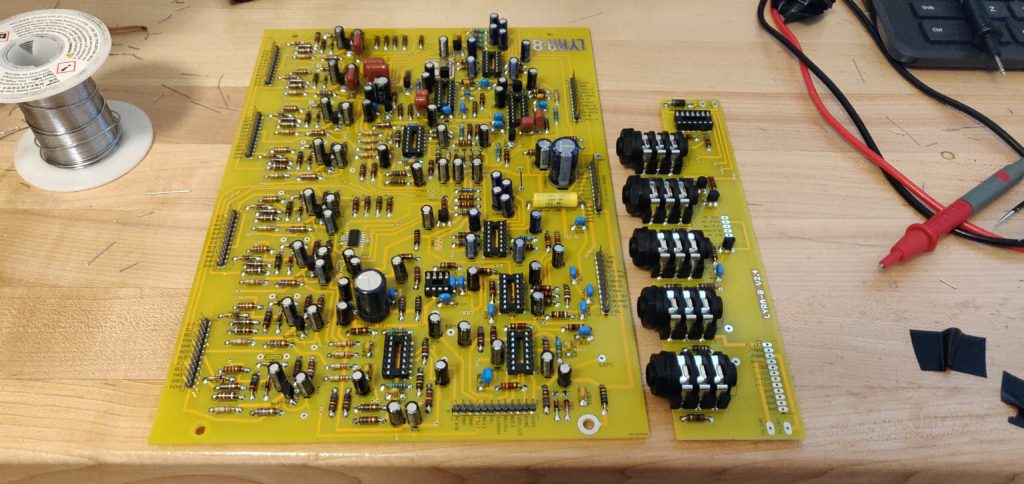
So it’s another week and it’s another blog. The LYRA-8 is looking delicious, but it still needs some time in the oven. So let’s talk about it!
Fixing those caps...
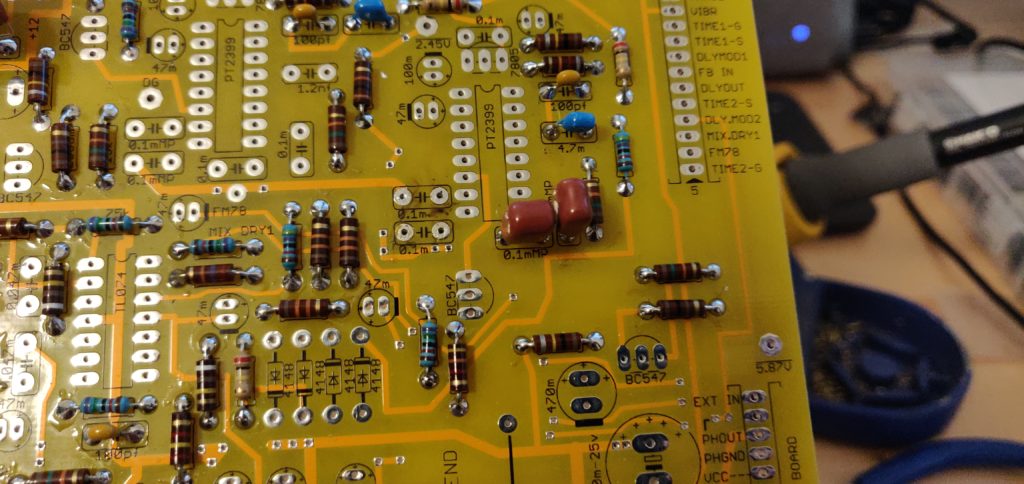
Remember those little buggers from my last LYRA-8 blog? The film capacitors I dropped in the ceramic capacitor location? Fear no longer, the caps are right where they belong now.
Dirty little pads...
Dirty little caps...
Then... BAM. Most of the caps done. LOOK AT THE NEAT PAPER ONE.
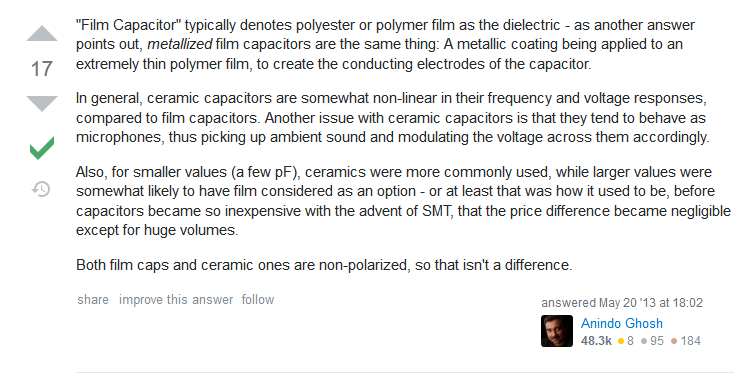
But wait… why would that even matter? Should it even make a difference if you use ceramic or film caps, as long they are the proper value? I hear you reader, but I am far too stupid to explain. So I will appeal to Google, and my friend Anindo Ghosh at Stack Exchange to explain the difference between film and ceramic capacitors.
Get it? GOOD. Moving on.
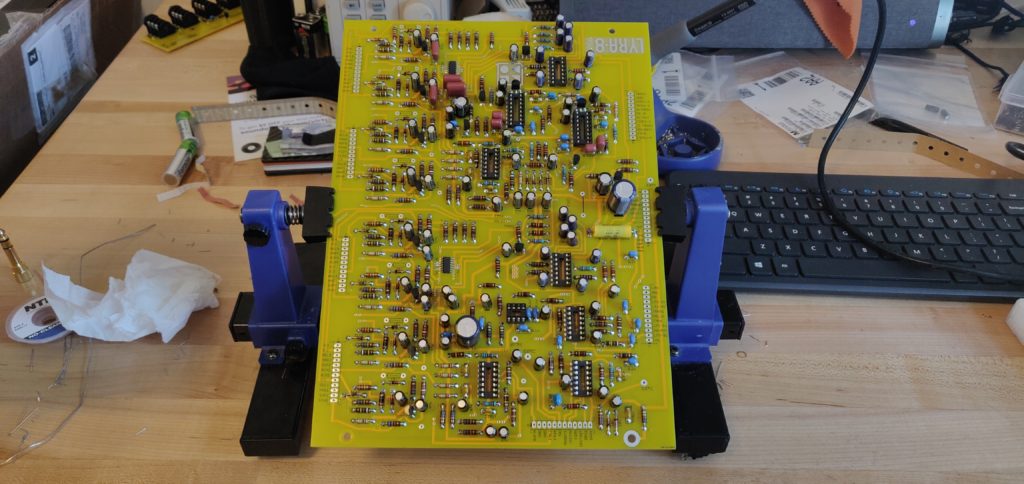
Finishing that Main Board, and the Dreaded C END
The rest of main board went well. No surprises or anything too exciting. I threw in all the diodes, transistors, and finally, the big old electrolytic capacitors. I soldered them in that order. Solder the headers at the very end… but you know this noble reader!
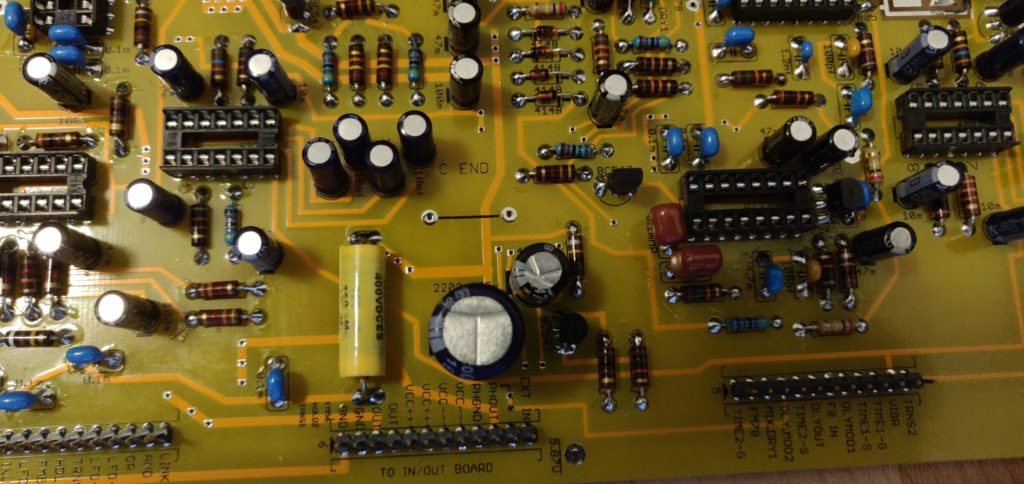
The only tip I will give involves a weird line on the board that says “C END”. Because I didn’t realize what it was for until it was far too late. Let’s see this line.
Look at it. All smug and straight.
So what is it? Well, that 2200uF capacitor to the right of the CAAAAYUUUTE paper capacitor shouldn’t be upright, like I have it. It should be laying flat, with its little electrolytic head right where “C END” is. And that little line with solder holes? That’s a place to wire your cap down so it doesn’t get bumped around… HOW COOL IS THAT.
Now you’re probably thinking, “Steve, you gave us a reading list, and the reading list very clearly states, a few times, exactly what you just said about the ‘C END’ line. What’s your problem?”.
First of all, don’t get lippy with me reader, or I’ll solder by myself!
Second, there is another rather large cap on the board, 1000uF, that sits ALMOST as tall as the 2200uF cap. Maybe by a difference of a few mm. So I had assumed the newest revision didn’t require the cap to be laid flat. I was wrong.
Anyways, the rest went smooth, like I said!
All done!
Until next time...
That’s it that’s all until next time. Here’s one more shot for the road!
Yaaasss. Very cool.
Oh wait! One more shot… because a rather large metal box arrived at my door today…
Cool.
So, so, so very pumped.
Have a beauty week out there! Keep it saaaauuucey.