DIY LYRA-8 Part 2: Build Diary #17

The day has come (and gone actually, but for effect we’ll pretend it’s today). The LYRA-8 I have been lovingly crafting for the past few weeks is…

Well you’ll just have to read on to find out!

Tidying up the Control Board

And by “tidying up” I mean finishing. Is that a Canadian thing?

Switches Soldered LYRA-8
So pretty. You are an artist Vlad.

Getting the switches down was a bit more painful then getting the pots down, but still not too wild. One thing you need to watch out for is if the leads are pressing against the metal switch housing on either side. You don’t want to be shorting the leads to ground, and if you’re lead touches that body, that’s precisely what will happen.

Wire spaced from switch housing
See how it's nice and separate from the body? Make sure you don't get lazy you sleepy little reader.

For the switches, I attached them to the panel before wiring them up; unlike the pots which I wired up prior to attaching them to the panel.

A good technique for keeping the leads on either side of the switches from touching is to stick something between the lead and the metal housing while bending it down onto the pad. I used tweezers, and you can see the little “kink” in the lead that my tweezers made in the picture above.

One other small note, I didn’t want to buy any more switches, so I used an MTS-203 in place of an MTS-103. No difference, an MTS-203 (or dual ON-OFF-ON) is just two MTS-103’s in the same housing.

MTS-203 instead of 103
See? No big deal! Just use one side and you're golden,.

Ahh. Complete panel. Good feeling… but wait. Something isn’t right here.

Removing front panel
Wait, now you're deconstructing the panel?! BUT WHY STEVE.

Let me tell you dear reader, I thought my spacers idea was perfect. Kept the control PCB nice and rigid while allowing the it to be screwed right into the main board. Perfect, right?

WRONG.

Flex was still a minor issue, and once I threw some screws for “touch pads”, the PCB flexed toward the bottom making it impossible to get the screws flush. And then I got to thinking… Why does the control board need to be attached the main board at all? Once it’s housed it won’t make any difference…

So. I popped off all the spacers and mounted the control board flat against the panel with some kapton tape. I recommend this method as well for anyone else taking a swing at Vlad’s little sound-baby.

Wiring up for Power

Now that everything is noice and toight, it’s time to get some juice into this moose.

I’m so sorry, please keep reading.


Wiring of 2.1mm Barrel Adapter
I went with this gnar gnar metal 2.1m barrel adapter from Tayda. If you're curious about how it's wired, this is how! (Black is ground)

And I GUESS you could just wire this straight to the little daughter-board that supplies power… But you’re insane if you’re someone who doesn’t want to flip a switch to turn something on. So I opted for a very standard toggle! Check it.

Power Toggle
Beautiful. And yes, watching Big Brother was on my to-do list for September 15th.

Looking good! Now we’re getting down to the nitty gritty…

One last thing, there are a two switches on the control board that can be attached to ground to eliminate “glitches” that can be heard when they are toggled. Big thanks to Muff user gnsk for the grounding diagram.

Wiring Ground Diagram
Thanks again gnsk.

Another thing I haven’t mentioned are the shields for the main board. They aren’t too exciting, so here’s a quick snap of their placement.

Shield Placement

Last stop, wiring everything up, plopping those ICs in place and getting this sucker powered up!

First Boot and Troubleshooting

Wiring wasn’t nearly as bad as I’d imagined. The headers made life easy and everything clicked together no problem.

LYRA-8 Wired and Ready

After getting all my ICs in place, I realized the Mouser Cart supplied by SOMA is missing the TD2822 IC. This IC is necessary for the headphone output to… well, output. No big deal, it won’t stop your LYRA-8 from working. I ordered one off Tayda and got back to it.

I won’t lie to you my precious reader, I was absolutely terrified to boot this thing up. I’m talking sweaty palms with my lovely life partner attempting to calm me down levels of terrified. I checked continuity on all the pins, I went over all the capacitors and diodes to check for polarity, made sure there were no shorts, and then rinsed and repeated this process for about two days, putting off the first boot as far as I could. Any issues would be extremely difficult to troubleshoot as there are no published schematics… But I took a few deep breaths (and another few deep breaths of a substance that is legal in this beautiful country) and I powered it up.

So what happened? We’ll come along reader, let’s see (hear?).

YASSS
YAAAAAAASSSSSSSSSSSSSSSSSSSSSSSSSSSSSSSSS

I stomped around my house shadowboxing for about 10 minutes after this video. I think I frightened our neighbours, but MAN was I pumped up.

So all good right? Done?

Well, kinda. After doing some testing I had a small issue where the LFO was not affecting the voices. I panicked and posted to Muffwiggler before I even attempted to troubleshoot.

About 5 minutes later after re-seating all the Dupont cables, everything started working PERFECTLY.

So, How's it Sound?

It sounds like space. It sounds like the scariest parts of space that are beautiful when you listen closely. It’s like a living space station filled with sounds that react to your touch.

Explain it without being weird? OK, fine.

It sounds amazing, the depth and timbre of this synth is something you’d need to have a lot of gear to simulate. And even then you wouldn’t come close, it would be a dirty facsimile of the monster that is the LYRA-8.

But it’s tough to describe with words. I’d go check out loopop’s awesome video(s) on it. My man’s loopop crushes it.

But long and short, get a little reverb on this thing and have the time of your life.

That's all Folks!

What a ride. I had an absolutely fantastic time building this synth, and I’ve had more fun playing with it. I still need to put together a case/enclosure for it. I’m not sure which route I will take at this point in time, but you can be sure, my vivacious readers, that you will get alllll the details when I have them.

The last thing I wanted to mention was the missing pieces from the SOMA Mouser cart. And that you can save quite a bit of money not using the SOMA Mouser cart.

First, the missing components were:

75K Resistor x8

TDA2822 x1

The 75K was an error, 75ohm resistors were included in the cart. The omission of the TDA2822 was likely due to Mouser not stocking this exact part. I grabbed this one here from Tayda.

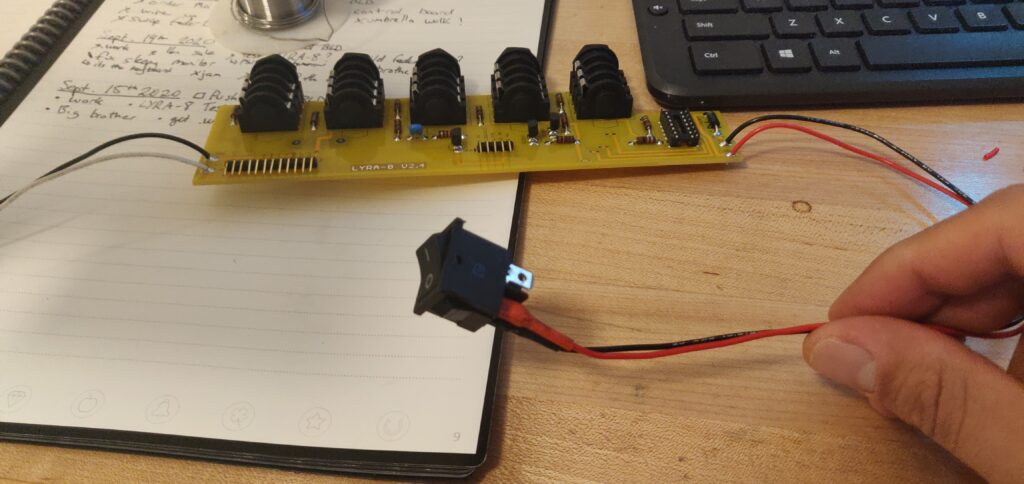
Also, you’re not getting the pots, connecting wire, switches, or hardware with the cart. This is standard fare for DIY builds, but be warned!

Second, if you source most of your parts from Tayda, and don’t get all aesthetics-ey with carbon resistors, you can save around $100 in Canadian rupees. Save your rupees!


So what’s next? Let’s see…

  • Deckard’s Dream
  • SWN DIY
  • Typhoon (oh yeah, just when you thought there were enough clouds in the sky)
  • SSSR SM042 KOTELNIKOV
  • And one day… the Buchla 208p

Getting nostalgic? Go peep some oldie goldies, like the Westlicht Performer Build, or even something a little different like the first installment of the Druid Diaries!


As always, thank you so much for reading. Your messages and comments make the time spent getting this silly posts together beyond worth it. Keep the messages coming! I LOVE ATTENTION.

Have a beauty week, and keep it samesies out there.


Check out the finale, part 3 DIY LYRA-8 build here.

This Post Has 16 Comments

  1. Bryan

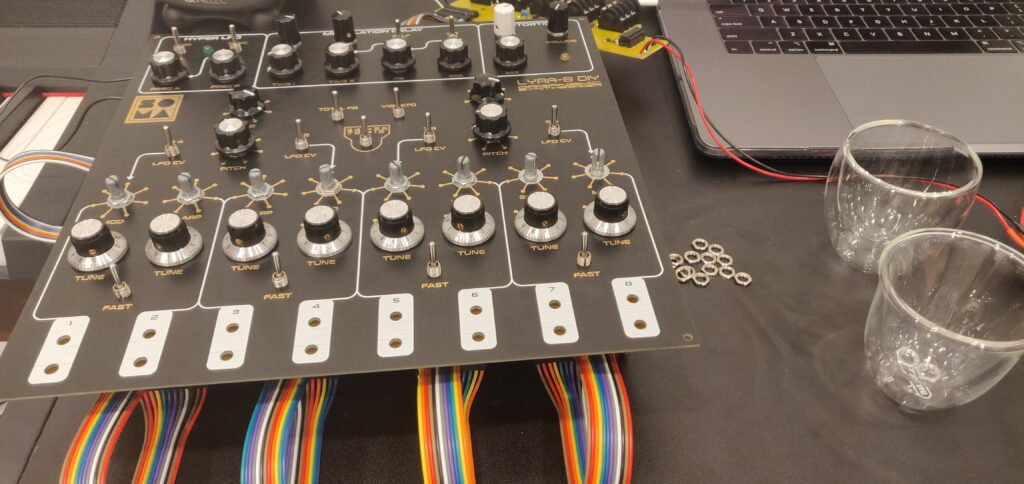
    What did you end up doing for a case?

    1. stevetravale

      Nothing as of yet! But the same place I bought the panel is thinking about making a case.

      Either that or I’ll commission a local carpenter to make me some sort of enclosure. Thanks a bunch for reading, hope it was helpful or at the very least entertaining!

  2. Bryan

    Both entertaining and informative!

    1. stevetravale

      Thanks Bryan, you made my day with your kind words!

  3. Ed

    I also found these posts to be interesting and useful. Thanks!

    1. stevetravale

      Thank you so much! Really appreciate it 🙂

      1. Konrad

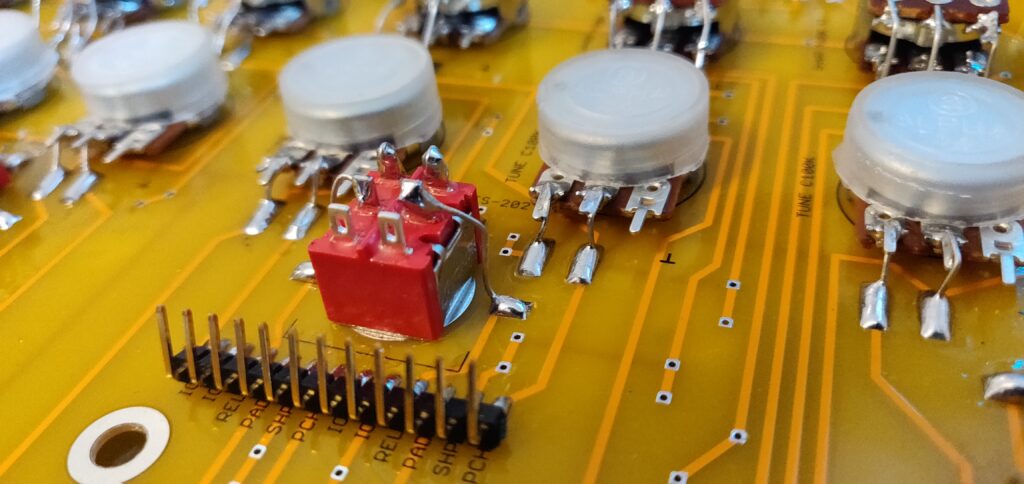
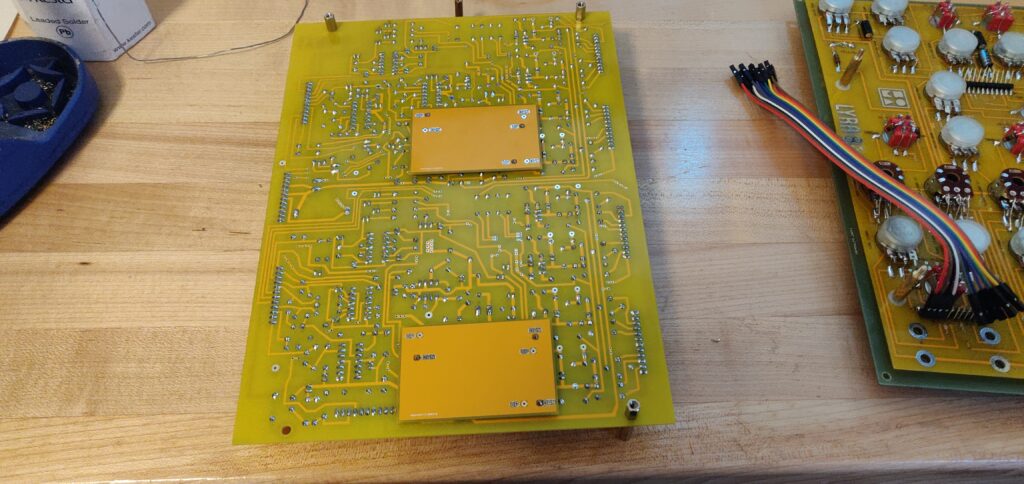
        Hi, how do you solder those shields? Just solder them with a lead to the main board? Just finishing mine project 🙂

        1. stevetravale

          Hey Konrad! Thanks for reading 🙂 I did exactly that! I broke off a pin header and used that to solder to the main board. Make sure you get the orientation correct so it shields correctly. Best of luck with your build!

  4. Paul

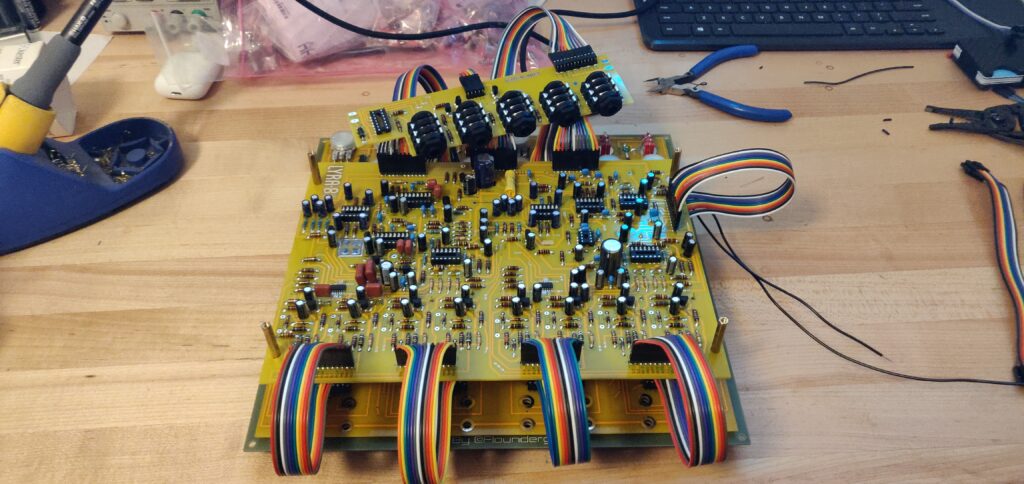
    This is useful mate thanks. What length of DuPont wires did you get ?300mm?

    1. stevetravale

      Glad it is helpful my friend! Thanks for reading.

      I went with 300mm, but I think something just a bit shorter would be better. Maybe 200mm, just something to cut down on the slack.

  5. MikaSims

    Hi Steve,

    Thank you very much for sharing this information with us. I want to ask a question. If possible, can you give me the dimensions of the knobs and even a link if possible?

    1. stevetravale

      Of course, I hope it is helpful! I am sorry, I can’t seem to find my order from Tayda with these knobs… but they were a mishmash between 6.35 round shaft knobs, and 6mm knurled shaft knobs. I am not near the Lyra or I’d do some measuring for you. One day I will, sorry again!

  6. Greg Feinberg

    This build diary has been super helpful, and fun! How did you mount the shields to the panel?

    1. stevetravale

      Hello Greg! Sorry for my delayed reply. I took three pin headers, and soldered one end into the shields, and the other end into the main board. I hope that helps!

  7. Jean-Philippe

    Hello Steve,
    I was wondering if your test points marked 5,87v were stable wherever the volume, distortion or mix knob were turned ?
    My lyra seems to work but I have very very weak volume and test points fluctuates when I turn those pots…
    Have a nice day.

    1. stevetravale

      I am sorry Jean-Philippe, my Lyra-8 testpoints are too deep in the case now 🙁 I don’t know if I’ll ever take it out unless I have some sort of issue. But I hope you have found an answer to your question and figured your issue out!

Leave a Reply