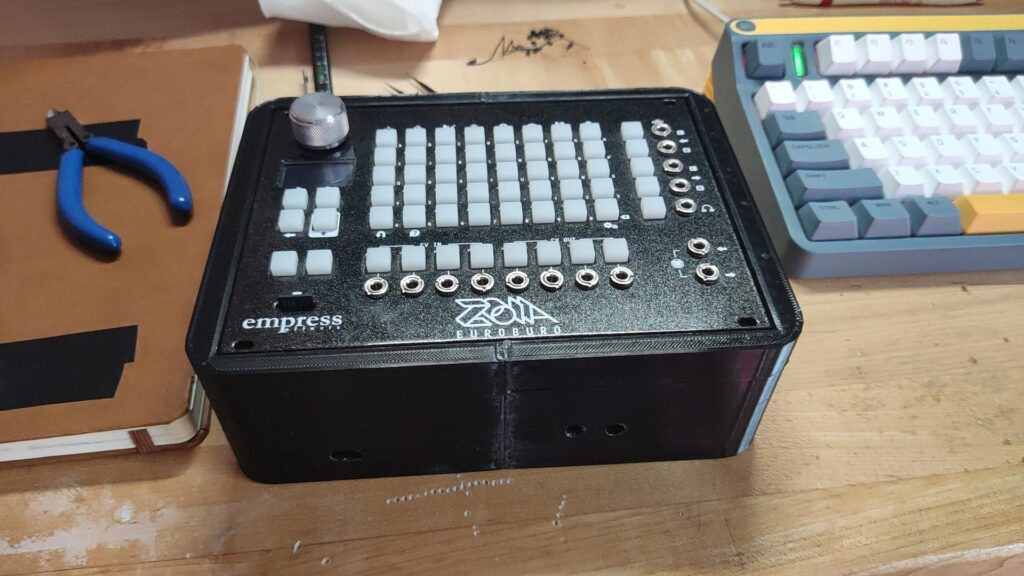
We’ve got some more battery powered good-times, and this-times its DIY EUROBURO case times.
Welcome back maybe? Either way, this started back in this blog post herewhere I was using some sweet sweet AliExpress finds to power the EUROBURO via a lithium-ion battery pack.
If you don’t want to leave this page, good on you, don’t let some internet synth nerd pressure you into clicking links. Essentially I attached the lithium ion battery to a DC to DC step up converter that pumps out a stable current a bit higher than the battery would normally output. The EUROBURO powers itself from this stepped up current via the 2-pin case connector on it’s back side.
Now it’s time to stuff it into a case!
Printing a Case
Alas, it had to be glued. One day I'll have a printer chonky enough to spit this out in one take.
Above is the mostly finished product. I had to glue the two halves of the enclosure together, and only time will tell how well this will hold. So far, so good; and it gets tossed around a fair bit.
The enclosure itself is made of PETG, which has been a stringy mess for me for the most part on anything more complex than a box, but when you’re making boxes, you gotta go PETG. Why, you ask? To ensure this rechargeable DIY EUROBURO case is nice and sturdy for those hot days at the beach, where PLA would be melty and sandy, rather than just sandy.
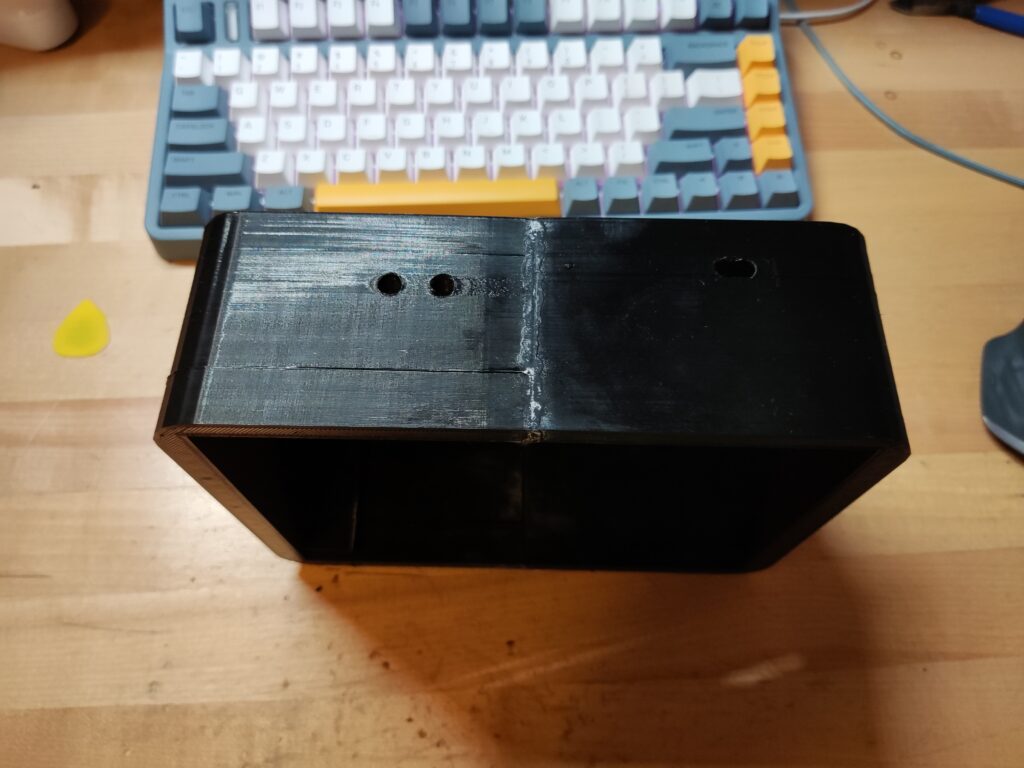
I left dual holes on the back side for the two toggle switches. I decided to abandon the idea of getting it to work with a single switch. I still don’t fully understand what is going on here, some kind of voltage droop when the module powers on I believe, but this solution works well enough for me to not want to investigate further.
There is also a far less visible hole on the right there for the USB-C port, so it can be charged!
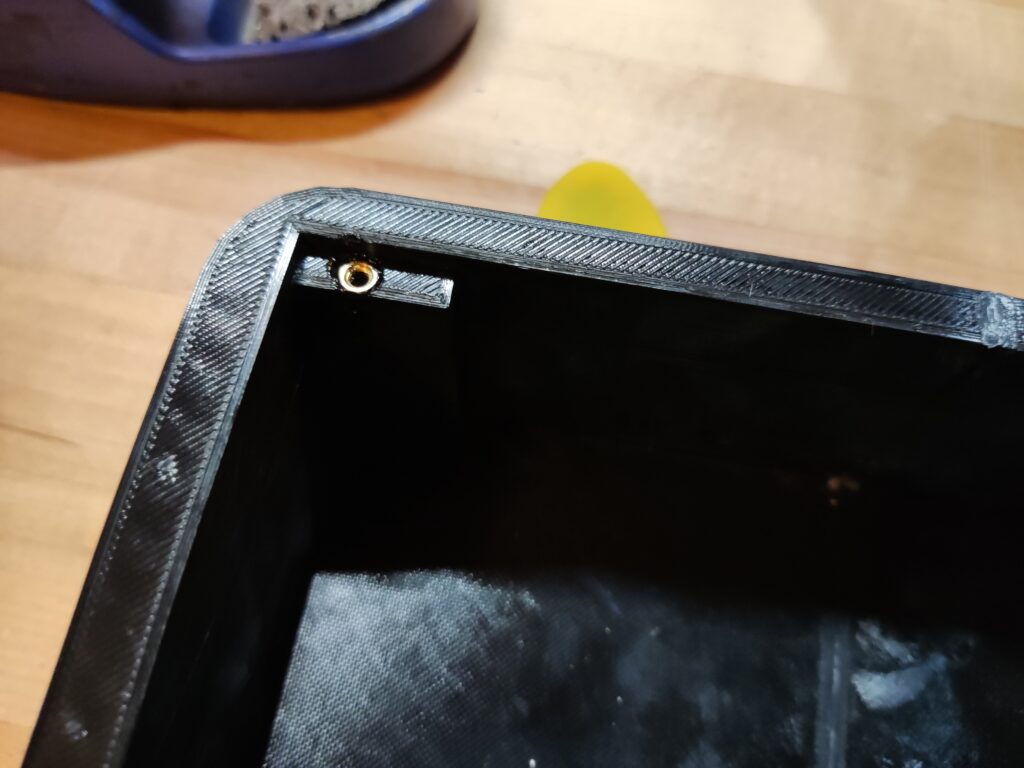
It isn’t perfect, but perfect is really fucking up my productivity, so we’re gonna go with very good from now on. The last thing before getting the electronics in was to push some standoffs into the posts on the box.
That last sentence made very little sense, so here is a picture that will make it make sense.
A picture is worth about 19 words.
Let's Get the Juice into this DIY EUROBURO Case
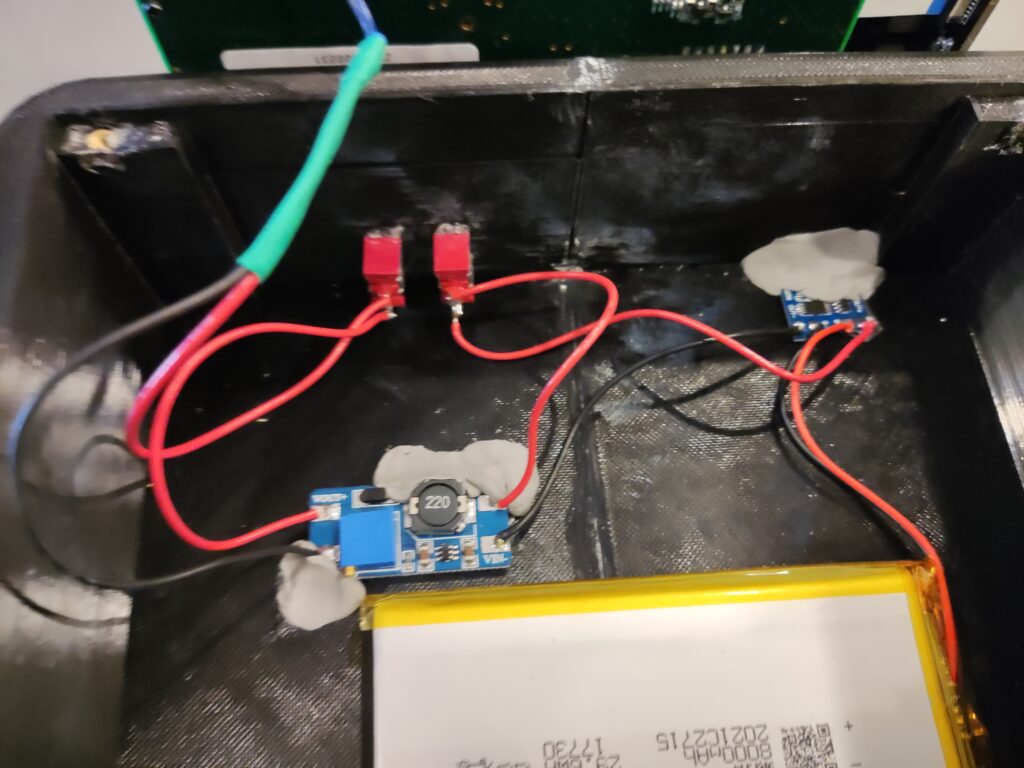
Now that the box is bangin’, we’re ready for the juicey bits.
A test fit shot where my mouse decided to jump in. What a little attention seeker.
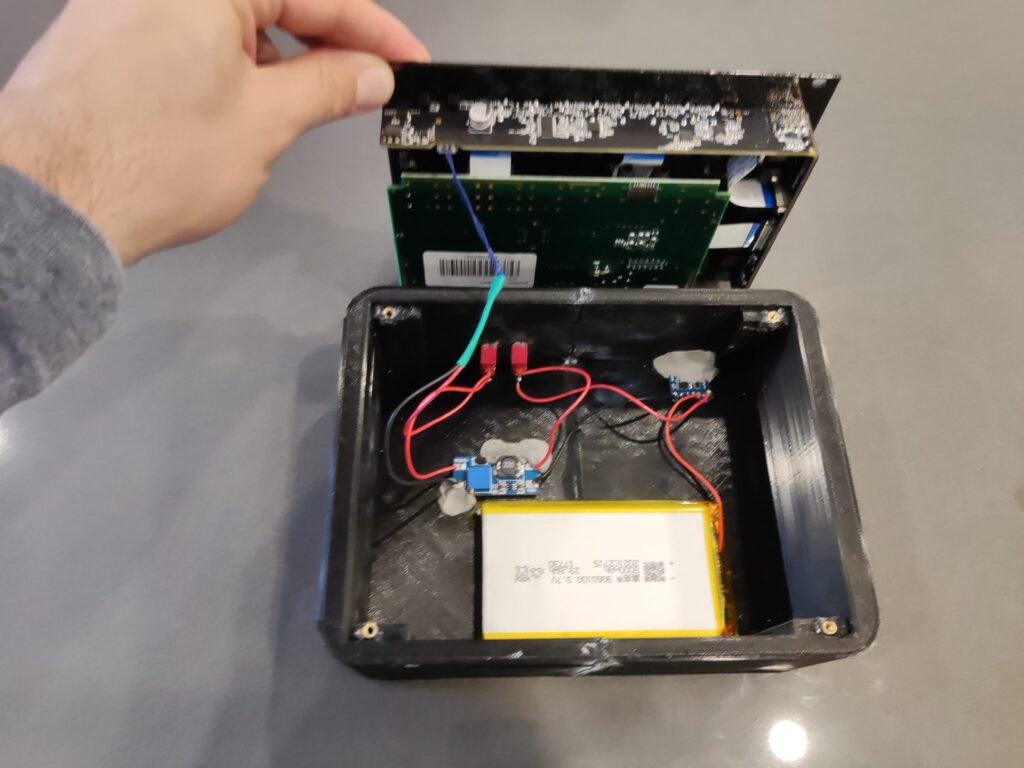
Everything fits nice, but I didn’t go the extra mile this time with recessed pockets for the electronics like I did in my little MIDI footswitch project, so Sugru came to the rescue! Such a shame it is so expensive, I’d have the house covered in it otherwise.
Them bits ain't goin' nowhere!
A little superglue and double sided tape later, things are looking pretty good!
A little look under the hood before its all closed up.
Now, for the final step before launch… Gotta charge this bad boy up!
USB-C charging just feels more modern, even when I make it janky.
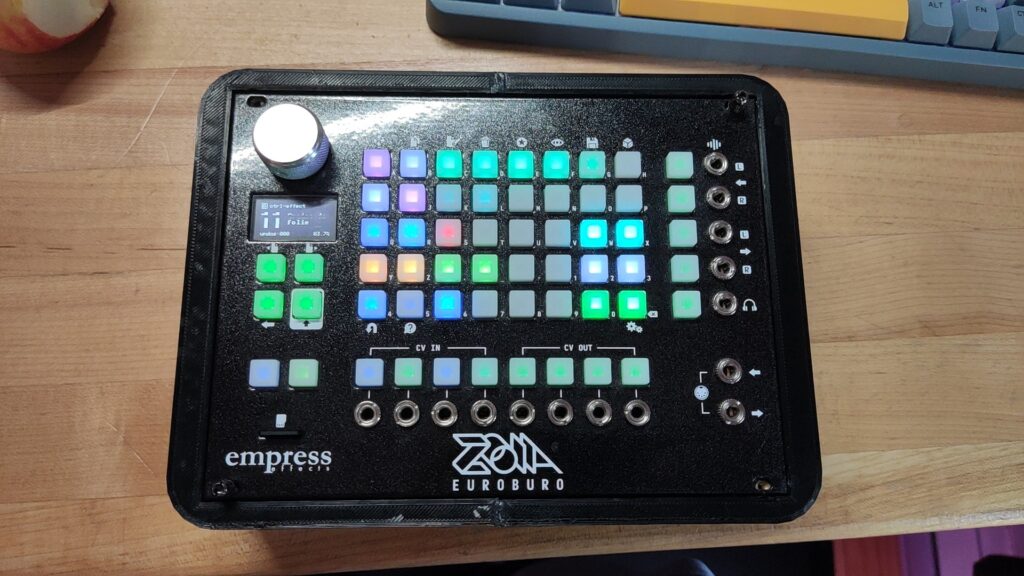
Does it EUROBURO?
You won’t believe it, but yes, it does!! And as I mentioned in my last post about it, the battery lasts a real long time. ~12 hours before I just turned it off because I was nervous about it being on that long.